Map Objects
The MapKit SDK lets developers display objects on a map. All map objects are customizable, facilitating unique user scenarios tailored to the developer needs.
Set up your project
All the explanations below assume that you already have an Android application with an activity and a MapKit SDK map. Learn more on how to create that kind of application in the Getting started with maps and placemarks tutorial.
Placemarks
Add custom image placemarks to the map with the MapObjectCollection.addPlacemark method from the Map instance's mapObjects field. It accepts the Point with coordinates for the placemark and the ImageProvider instance, which can be created from a drawable resource.
val placemark = map.mapObjects.addPlacemark(
    Point(25.198200, 55.272758),
    ImageProvider.fromResource(this, R.drawable.ic_pin)
)
The code above creates an instance of the PlacemarkMapObject class that extends the MapObject interface.
The MapObject interface represents every visible object on the map. There are a few ways to configure map objects: changing visibility, allowing dragging, changing a z-index, setting a tap or drag event listener, setting userData, and more.
For more details, see the MapObject documentation.
Setting text
You can create text labels near placemarks. Use the PlacemarkMapObject.setText method.
Use TextStyle to change how labels look, including their text size, color, and position relative to the icon.
placemark.setText(
    "Special place",
    TextStyle(/* args */)
)
Icon styles
You can customize how placemark icons are presented using the IconStyle class. It lets you change the icon's anchor position, size, rotation type, z-index, tappable area, visibility, and flatness to the map.
val placemark = map.mapObjects.addPlacemark(
    Point(25.198200, 55.272758),
    ImageProvider.fromResource(this, R.drawable.ic_pin),
    IconStyle(/* args */)
)
Composite icons
Combine multiple icons to create a composite one.
-
Create a default icon using
MapObjectCollection.addPlacemark. -
Call PlacemarkMapObject.useCompositeIcon to create a composite icon.
-
Use CompositeIcon.setIcon to add a new icon to the composite icon.
Complete sample code for creating a composite icon:
val placemark = map.mapObjects.addPlacemark(Point(25.198200, 55.272758)).apply {
    setText(
        "Special place",
        TextStyle().apply {
            size = 10f
            placement = Placement.RIGHT
            offset = 5f
        },
    )
}

placemark.useCompositeIcon().apply {
    setIcon(
        "pin",
        ImageProvider.fromResource(this@Activity, R.drawable.ic_dollar_pin),
        IconStyle().apply {
            anchor = PointF(0.5f, 1.0f)
            scale = 0.9f
        }
    )
    setIcon(
        "point",
        ImageProvider.fromResource(this@Activity, R.drawable.ic_circle),
        IconStyle().apply {
            anchor = PointF(0.5f, 0.5f)
            flat = true
            scale = 0.05f
        }
    )
}
The result:
![]()
Animated placemarks
You can create an animated placemark from an animated png file.
-
Create the placemark using
MapObjectCollection.addPlacemark. Pass theAnimatedImageProviderinstance as a second parameter.val placemark = map.mapObjects.addPlacemark( Point(25.198200, 55.272758), AnimatedImageProvider.fromAsset(this, "animation.png") ) -
Call the PlacemarkMapObject.useAnimation method to create an animation object.
val animation = placemark.useAnimation() -
Start the animation, managing it with the PlacemarkAnimation object.
animation.play()
Placemark collections
Placemark collections are used to group multiple placemarks into a new collection of nested map objects.
-
To create a collection of nested map objects, use the MapObjectCollection.addCollection method.
val pinsCollection = map.mapObjects.addCollection() -
From now, you can use your new
pinsCollectionto display placemarks and other map objects.val points = listOf( Point(25.190614, 55.265616), Point(25.187532, 55.275413), Point(25.196605, 55.280940), Point(25.198219, 55.272685), ) val imageProvider = ImageProvider.fromResource(this, R.drawable.ic_pin) points.forEach { point -> pinsCollection.addPlacemark(point, imageProvider) }Note
Use a single
ImageProviderinstance if you need to display multiple similar placemarks. That will be more efficient than creating a new instance for each placemark.What it looks like after placemarks were added to a collection of new map objects:
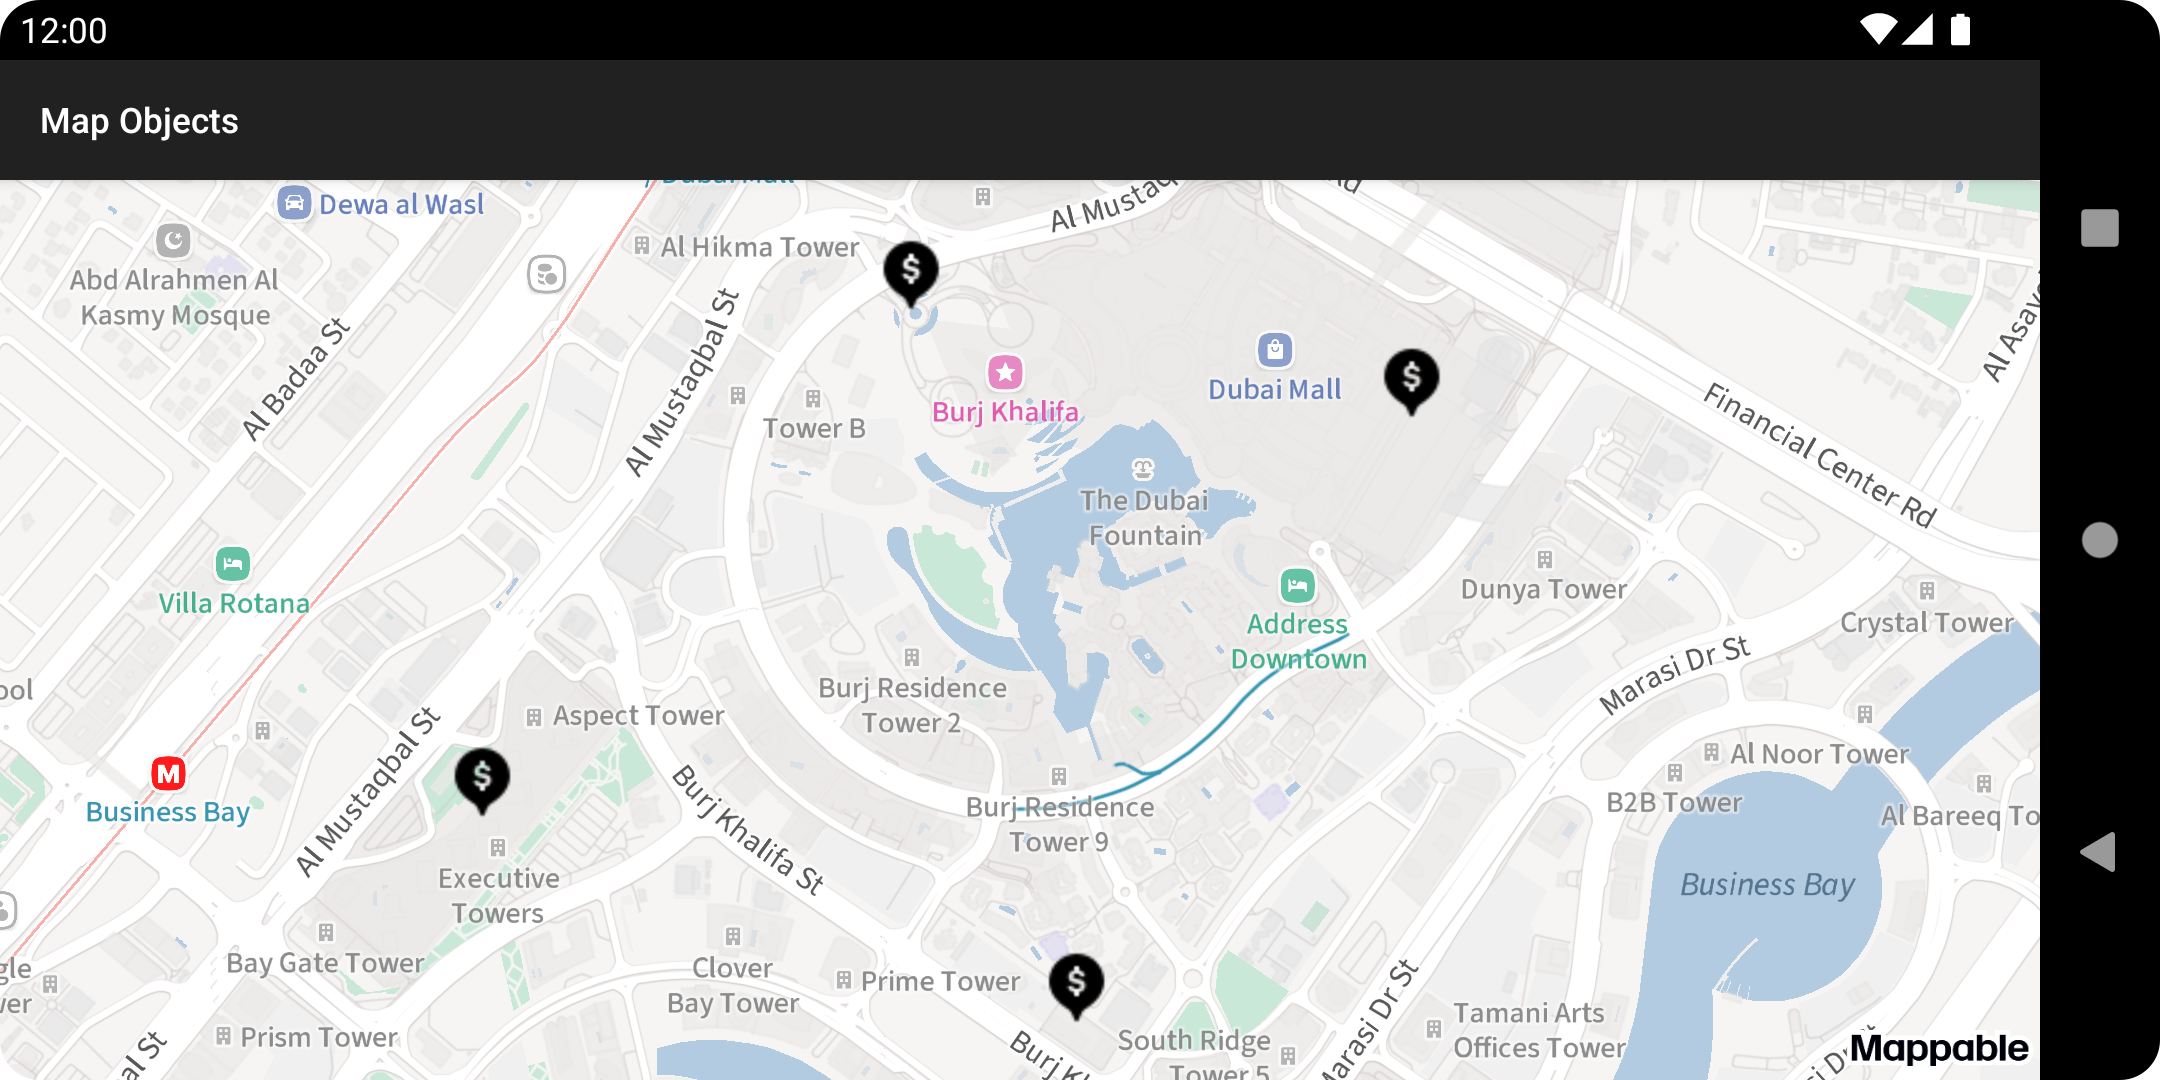
After creating pinCollection, you can add pins to it the same way as for map.mapObjects since they have the same MapObjectCollection type.
Note
The MapObjectCollection interface extends MapObject. That is why it is allowed to create nested collections and add them to another collections.
All methods that have the MapObject interface are also available in MapObjectCollection.
You can iterate through MapObjectCollection elements using the BaseMapObjectCollection.traverse method.
Geometries
The MapKit SDK lets you draw primitive geometric objects like polygons, polylines, and circles on the map. They're all customizable, and they implement the MapObject interface.
Polygons
Use a polygon when you need to display a map area to users.
-
Start by creating a
Polygoninstance.val points = listOf( Point(25.190614, 55.265616), Point(25.187532, 55.275413), Point(25.196605, 55.280940), Point(25.198219, 55.272685), ) val polygon = Polygon(LinearRing(points), emptyList()) -
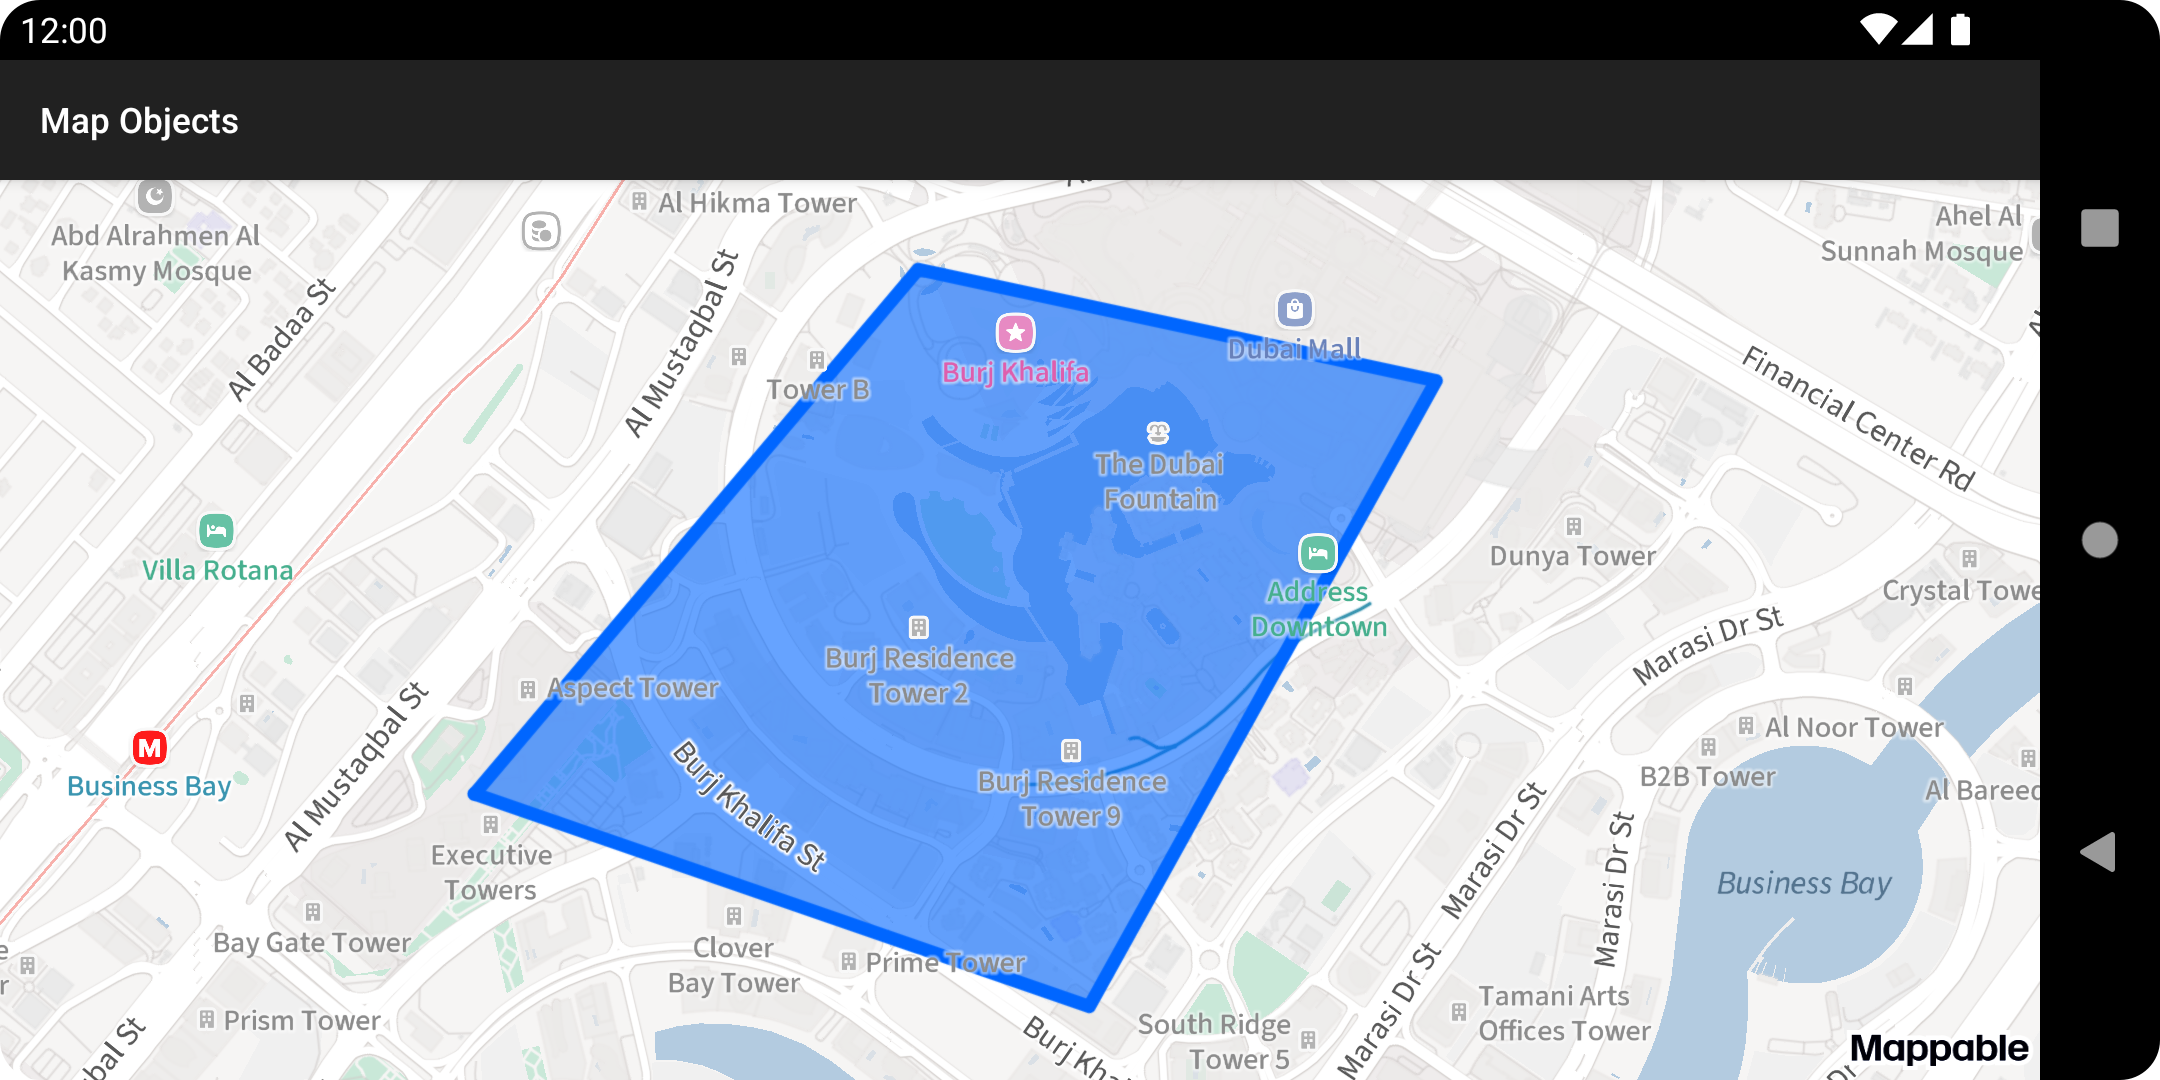
Use the MapObjectCollection.addPolygon method to create a polygon map object.
val polygonMapObject = map.mapObjects.addPolygon(polygon)After the build is complete, you will see a default-styled polygon:
-
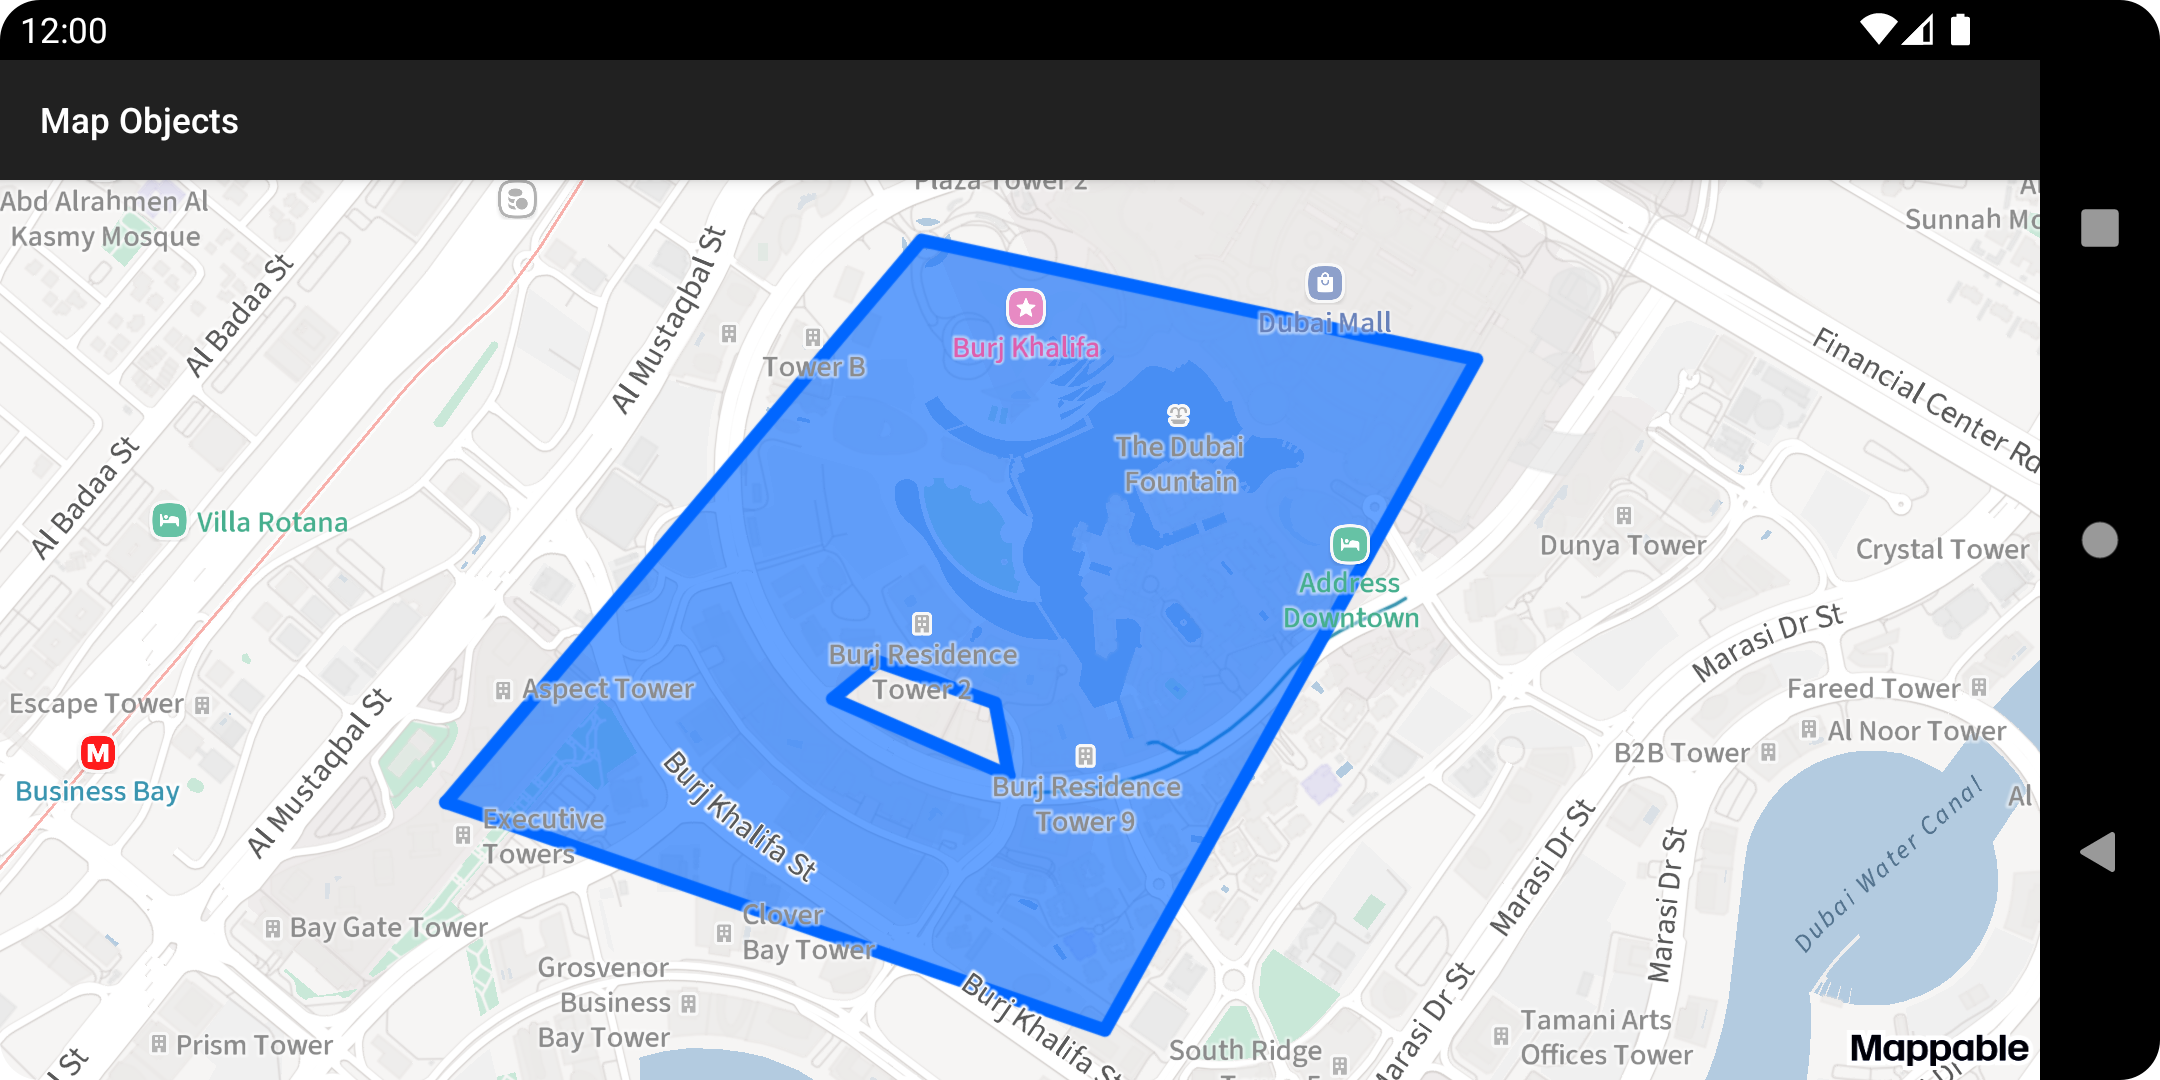
Define inner points while creating a polygon to exclude a section on the inside of the polygon.
val points = listOf(
    Point(25.190614, 55.265616),
    Point(25.187532, 55.275413),
    Point(25.196605, 55.280940),
    Point(25.198219, 55.272685),
)
val innerPoints = listOf(
    Point(25.190978, 55.273982),
    Point(25.191958, 55.273780),
    Point(25.192516, 55.272040),
    Point(25.192015, 55.271365),
)
val polygon = Polygon(LinearRing(points), listOf(LinearRing(innerPoints)))
Polygon with inner points:
-
Let's change the default fill color and stroke using the
PolygonMapObjectinstance we created.polygonMapObject.apply { strokeWidth = 1.5f strokeColor = ContextCompat.getColor(this@Activity, R.color.olive) fillColor = ContextCompat.getColor(this@Activity, R.color.green) }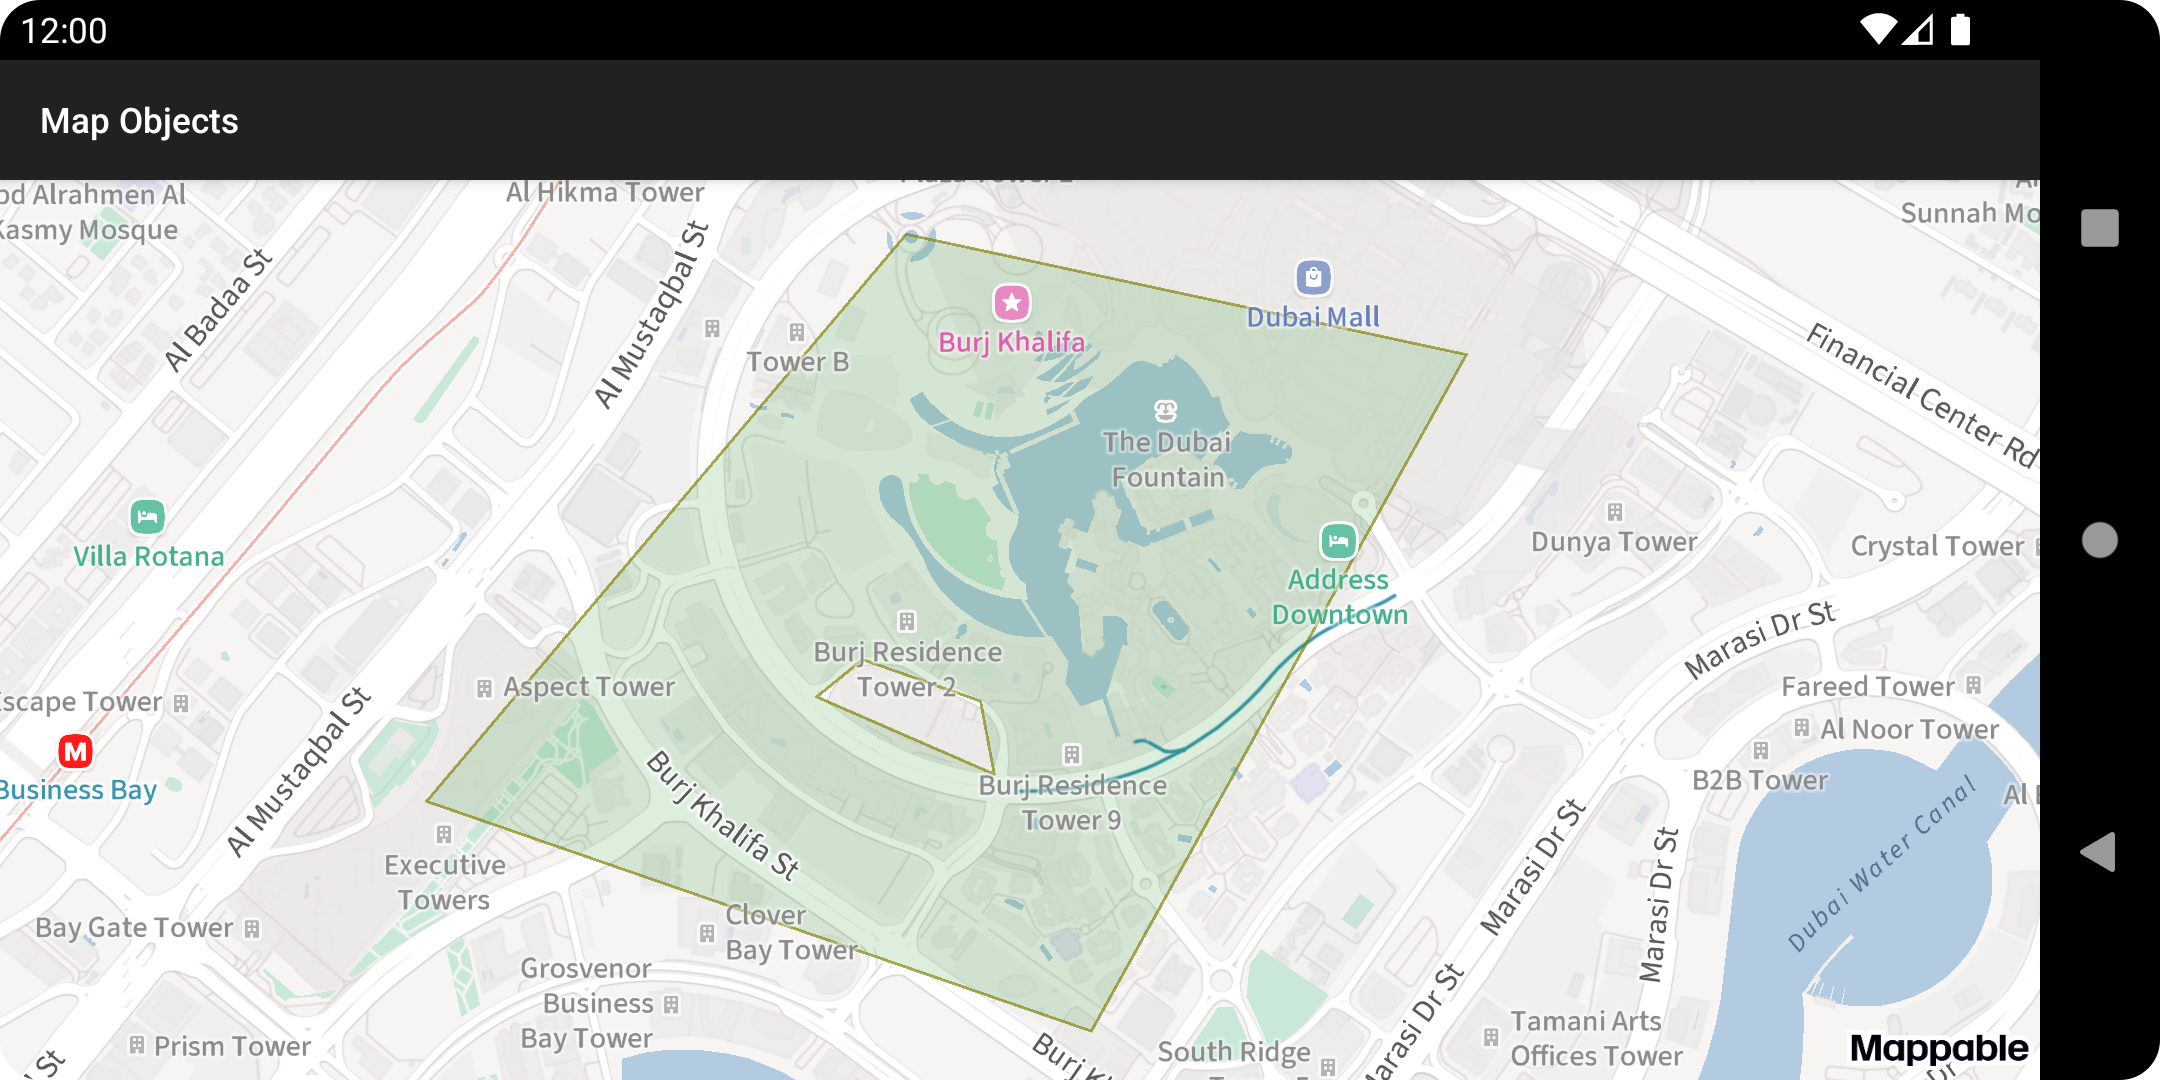
For more details on how to configure polygons, see the PolygonMapObject documentation.
Polylines
Polylines are often used to display routes and trajectories.
-
Create a
Polylineinstance with the geometry you're looking for and add a polyline map object to the map using the MapObjectCollection.addPolyline method.val points = listOf( Point(25.190614, 55.265616), Point(25.187532, 55.275413), Point(25.196605, 55.280940), Point(25.198219, 55.272685), ) val polyline = Polyline(points) val polylineObject = map.mapObjects.addPolygon(polygon) -
Configure polyline styles using the
polylineObjectvariable.polylineObject.apply { strokeWidth = 5f setStrokeColor(ContextCompat.getColor(this@Activity, R.color.gray)) outlineWidth = 1f outlineColor = ContextCompat.getColor(this@Activity, R.color.black) }Once you've added the polyline to the map:
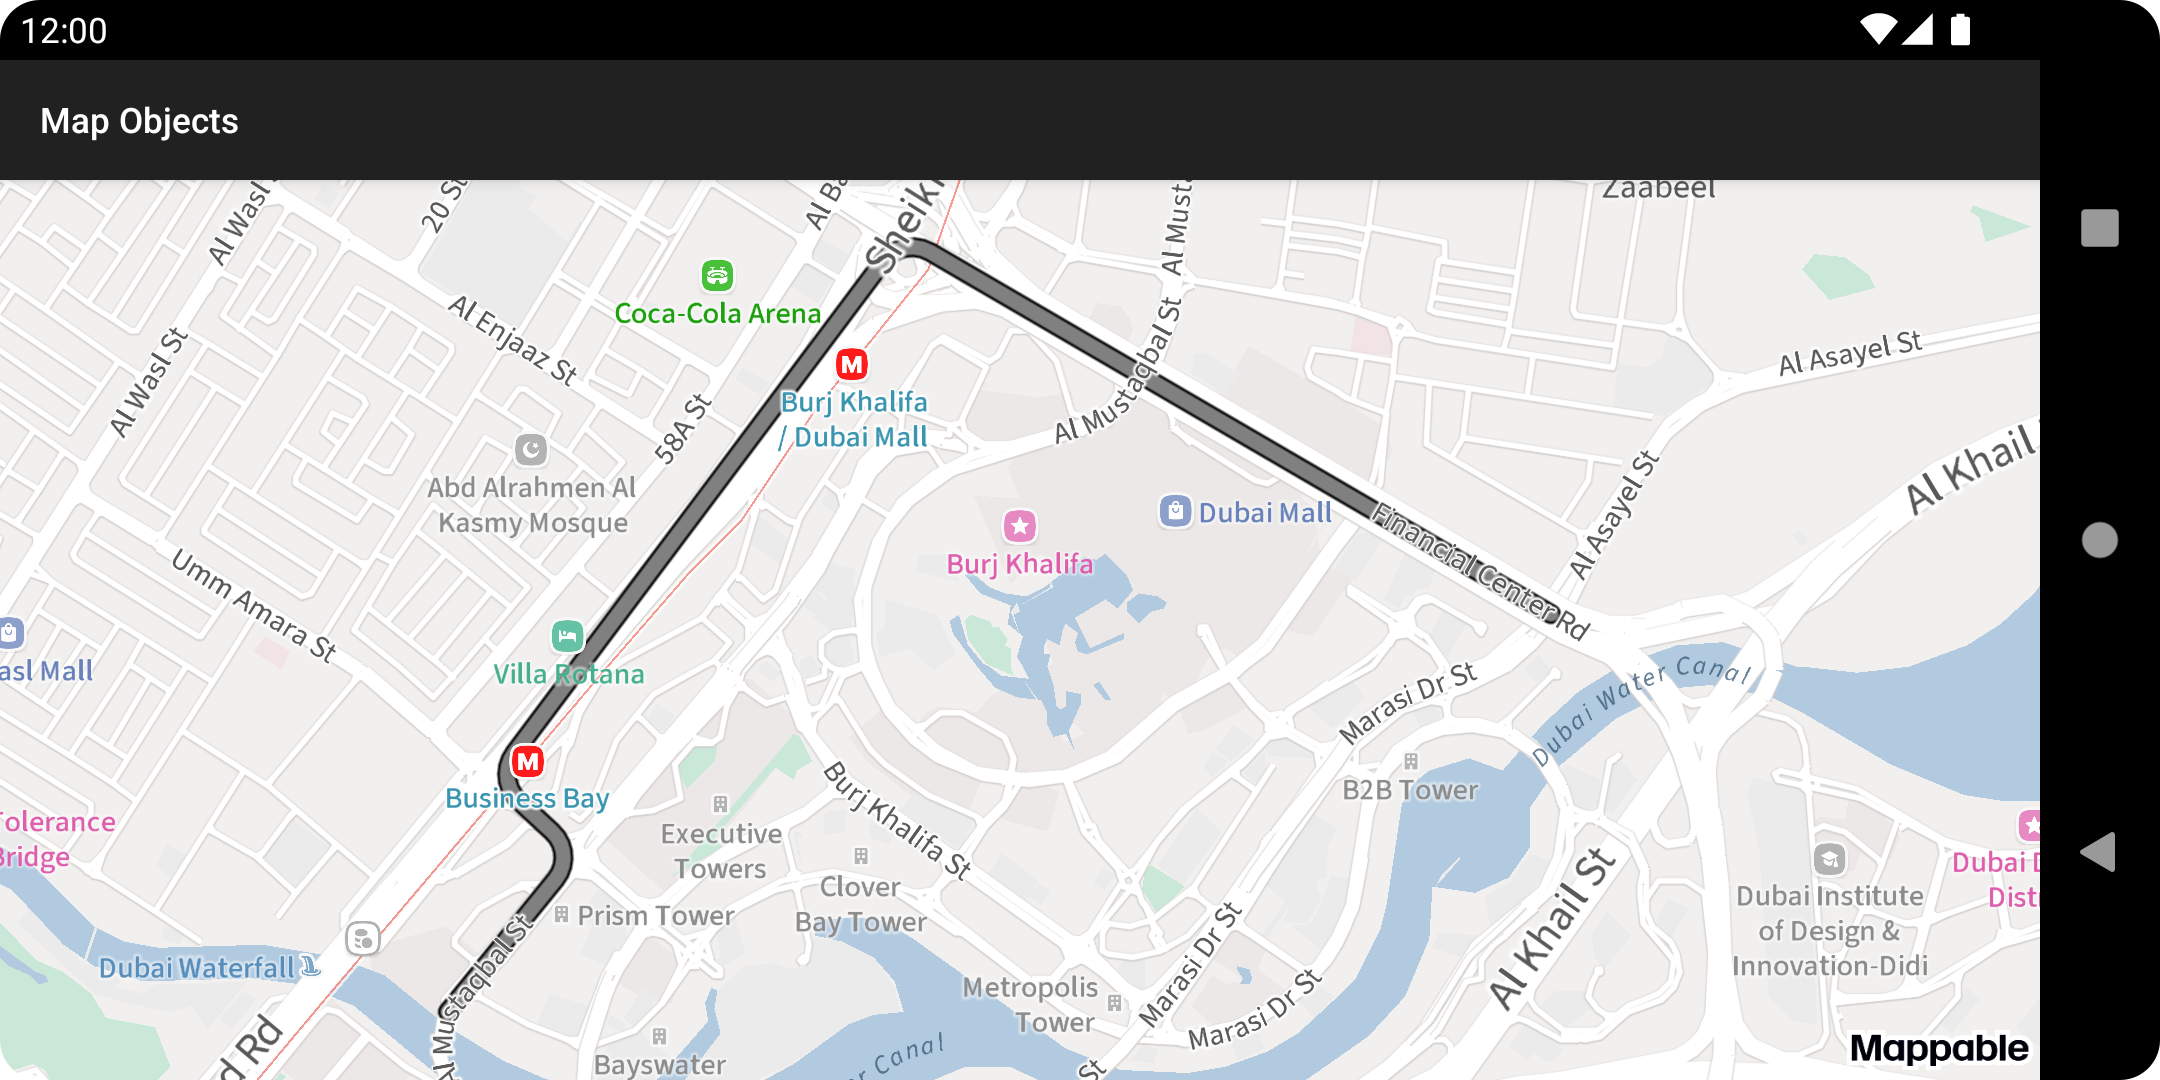
For more details, see the PolylineMapObject documentation.
Circles
Circles are used to display circular areas.
-
Create a
Circleinstance with the geometry you're looking for: a center point and a radius in meters.val circle = Circle( Point(25.198200, 55.272758), 400f ) -
Using the MapObjectCollection.addCircle method, add a circle object to the map.
map.mapObjects.addCircle(
    circle,
    /* strokeColor */ ContextCompat.getColor(this, R.color.red),
    /* strokeWidth */ 2f,
    /* fillColor */ ContextCompat.getColor(this, R.color.red_alpha)
)
After adding a circle to the map:
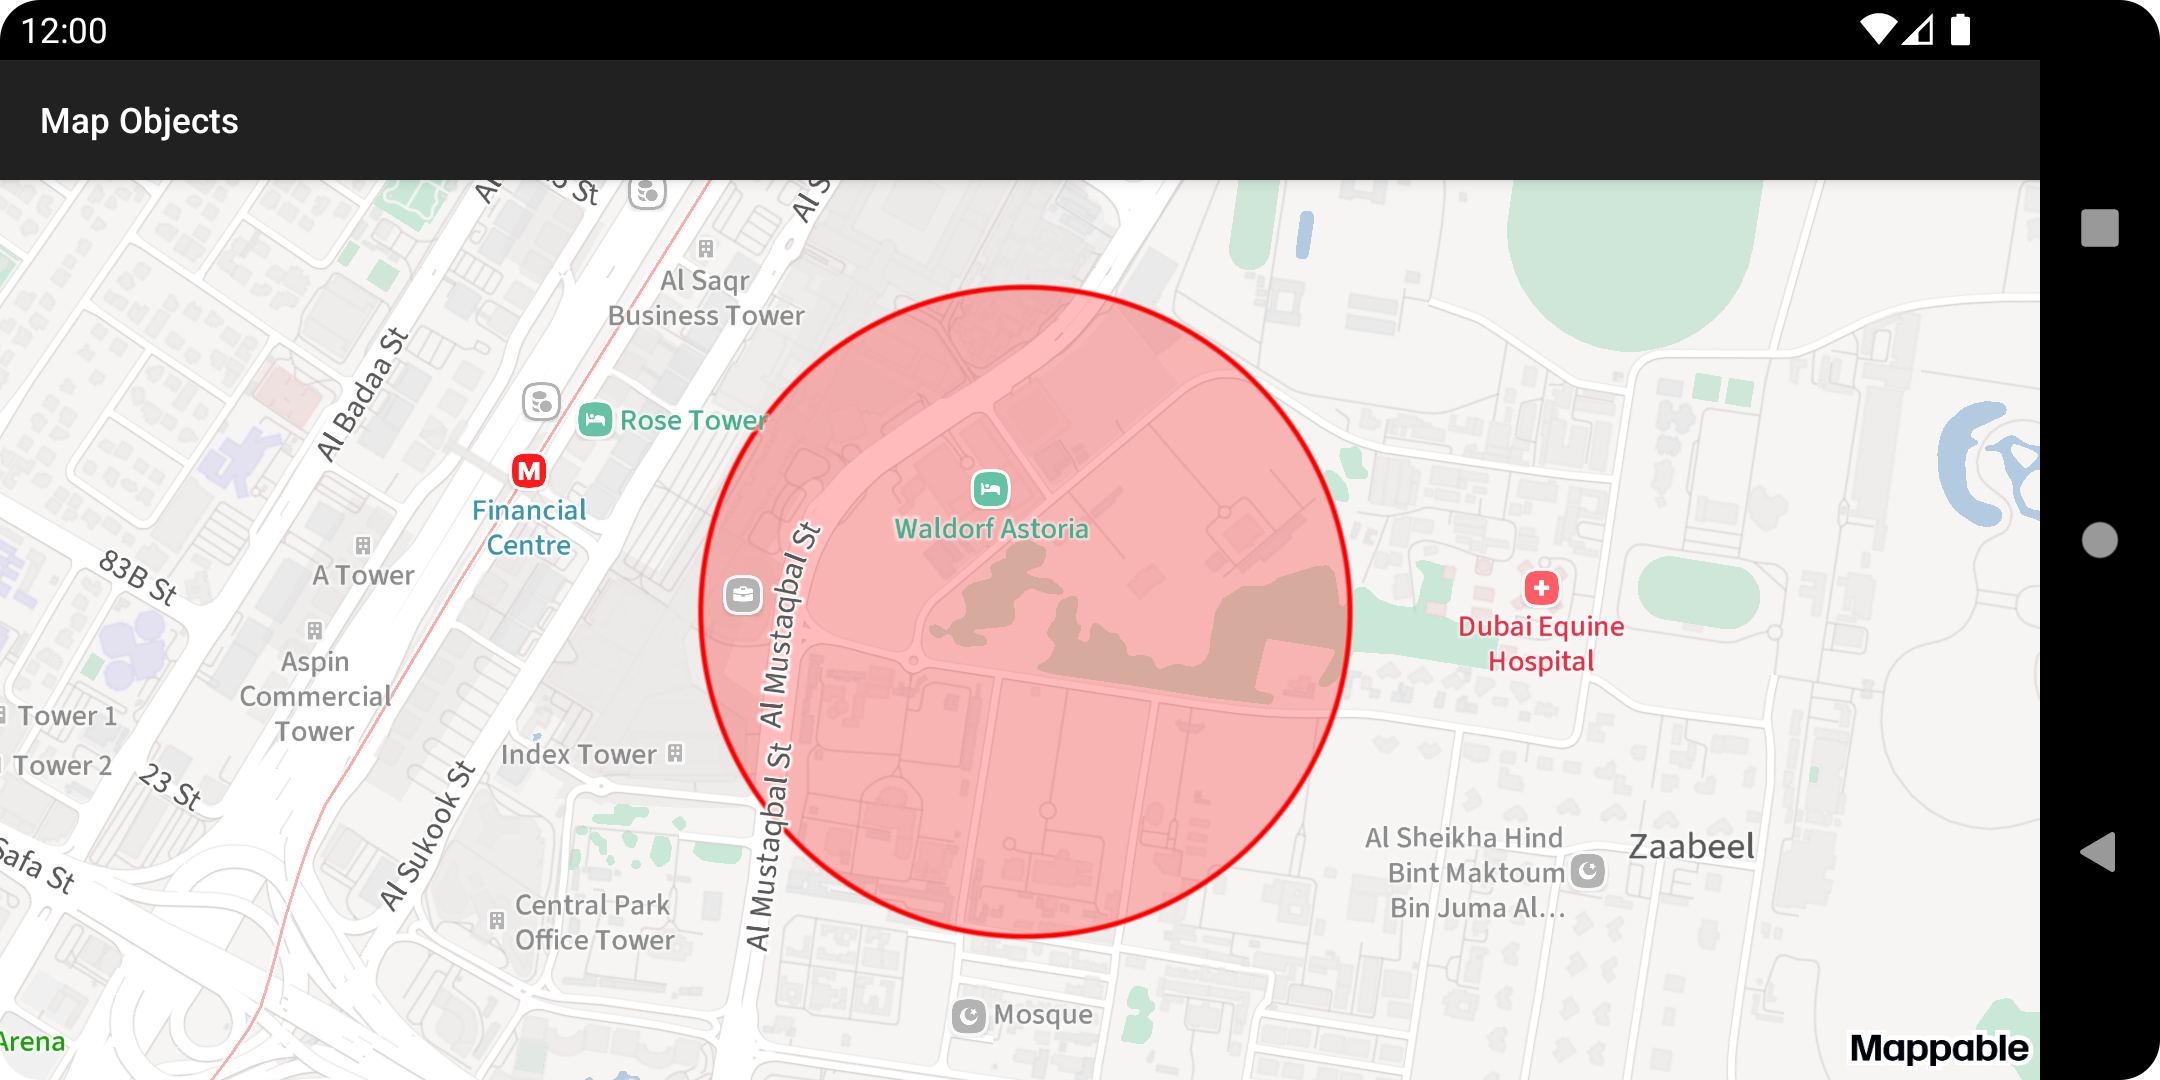
For more details on how to configure a circular map object, see the CircleMapObject documentation.
Clusters
Clusterized collections are used to display multiple placemarks.
-
Start by creating a
ClusterListenerwith a singleonClusterAddedmethod that controls the appearance of the cluster on the map.val clusterListener = ClusterListener { cluster -> cluster.appearance.setView( ViewProvider( ClusterView(this).apply { setText("${cluster.placemarks.size}") } ) ) }The
cluster.appearanceproperty returns aPlacemarkMapObjectobject. In our example, we're using thesetViewmethod to change how the cluster looks.ClusterViewis a custom defined class. Check out our GitHub repository to see how it's implemented. -
Create a new nested collection using the MapObjectCollection.addClusterizedPlacemarkCollection method.
val clusterizedCollection = map.mapObjects.addClusterizedPlacemarkCollection(clusterListener) -
Add multiple placemarks to the new
clusterizedCollection.val points = listOf( Point(25.190614, 55.265616), Point(25.187532, 55.275413), Point(25.196605, 55.280940), Point(25.198219, 55.272685), ) val imageProvider = ImageProvider.fromResource(this, R.drawable.ic_pin) points.forEach { point -> clusterizedCollection.addPlacemark(point, imageProvider) } -
Call the ClusterizedPlacemarkCollection.clusterPlacemarks method. It accepts two arguments:
clusterRadius: the minimum distance in units between objects that remain in separate clusters.minZoom: the minimum zoom level that displays clusters.
clusterizedCollection.clusterPlacemarks(60.0, 15)Warning
The
ClusterizedPlacemarkCollection.clusterPlacemarksshould be called explicitly whenever placemarks are added to or removed from clusterized collections.Otherwise, clusterized placemarks will be not re-rendered.
Clusterized placemarks at different zooms:
